Why You’ll Love This Homemade Dill Pickles Recipe
You’re going to adore this homemade dill pickles recipe! It’s not just about flavor; it’s a delightful way to preserve summer’s bounty.
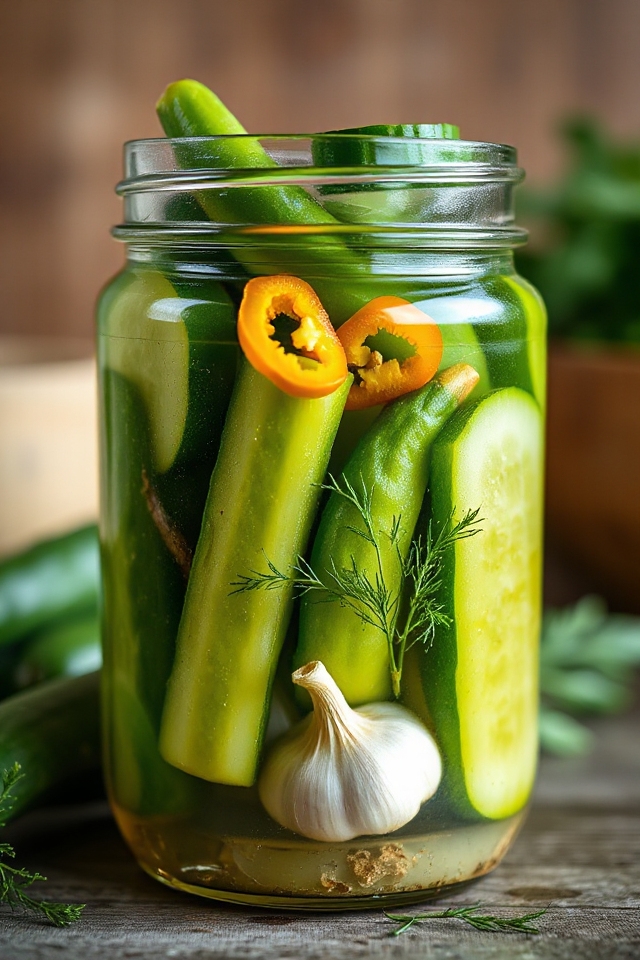
When I first tried this recipe, the crunch and tang blew me away. The aroma of fresh dill and garlic fills the kitchen, making it feel like a cozy haven.
Plus, the vibrant colors of cucumbers and spices create a feast for the eyes. I love that I can customize each jar with jalapeños for a kick or keep it classic.
It’s a rewarding process, and you’ll find yourself making batch after batch to share with friends!
Ingredients of Homemade Dill Pickles
Making homemade dill pickles is a fun and rewarding adventure in the kitchen. You’ll find that putting together the ingredients is simple, but the flavors that develop over time are what really make this recipe shine.
Just imagine the satisfaction of cracking open a jar and tasting that perfect balance of crunch, tang, and a touch of heat from the jalapeños. It’s a little like summer in a jar, and who wouldn’t love that?
Here’s what you’ll need to gather for your dill pickle-making journey:
- 2 quarts water
- 2 quarts vinegar
- 1 cup non-iodized salt (you can halve this if you prefer less salt)
- 2 jalapeño peppers (one for each jar, or more if you like it spicy)
- Dill weed (to taste, in each jar)
- 1 head garlic (divided between the jars)
- Green tomatoes (sliced, to taste)
- Onion (sliced, to taste)
- 1 dozen cucumbers (sliced to fit your jars)
Now, let’s talk about some considerations regarding these ingredients. First off, the cucumbers are the stars of the show, so make sure you pick the freshest ones you can find. You want them to be crispy and firm, not mushy or overripe.
As for the garlic and dill, feel free to adjust those amounts based on how much you like these flavors. And if jalapeños aren’t your thing, you can certainly leave them out, or swap them for another pepper variety that suits your taste.
Just remember, this is your pickle-making adventure, so feel free to get creative. Happy pickling!
How to Make Homemade Dill Pickles
Alright, let’s plunge into the delightful world of making homemade dill pickles. You’ve got your ingredients prepped, so now it’s time to get cooking. First things first, grab a large pot and combine 2 quarts of water, 2 quarts of vinegar, and 1 cup of non-iodized salt. Yes, you read that right—one whole cup. That’s a lot of salt, but it’s what gives those pickles that classic briny flavor.
Now, bring this mixture to a rolling boil. You’ll want to keep an eye on it because, trust me, a watched pot does boil, but it can also bubble over if you’re not careful. So, maybe take this time to do a little happy dance or reflect on your life choices—whatever floats your boat.
While that brine is heating up, prepare your jars. Make sure they’re clean and ready for action. You can use pint or quart jars, depending on how many pickles you’re making or how much you love pickles (no judgment here).
Now, it’s time to get creative with your jars. Start by adding a jalapeño pepper to each jar for a nice kick. Then, sprinkle in some dill weed—this is where the magic really happens. Follow that up with a few cloves of garlic, sliced green tomatoes, and onion.
And finally, it’s time to stuff those jars with your cucumbers, sliced to fit perfectly. If you’re like me, you might even get a little competitive about how many cucumbers you can fit in each jar. Just remember, they need to be snug but not squished.
Once your brine is bubbling away, carefully pour it over the packed jars. Make sure to leave a little space at the top, about half an inch, so the pickles can expand while they soak up all that flavorful goodness.
Seal those jars tightly, and now comes the hardest part—waiting. Let those jars sit for about six weeks. Yes, six weeks. It might feel like an eternity, but trust me, it’s worth it when you finally crack one open and taste that crunchy, tangy, and just slightly spicy pickle.
Homemade Dill Pickles Substitutions & Variations
While the classic recipe for homemade dill pickles is a tried-and-true favorite, experimenting with substitutions and variations can lead to delightful new flavors.
For a spicy kick, I love adding crushed red pepper flakes or sliced habaneros instead of jalapeños. If I’m in the mood for a sweeter twist, I might toss in a bit of sugar.
Using different herbs like coriander or mustard seeds can also create unique tastes. Sometimes, I even swap cucumbers for zucchini or green beans.
Each variation brings a new experience, making every batch special and exciting. Don’t be afraid to try something different!
What to Serve with Homemade Dill Pickles
There’s something special about homemade dill pickles that can elevate a meal.
I love serving them alongside burgers or grilled sausages; the crunch and tang perfectly complement the richness of the meat. They also shine with charcuterie boards, adding a zesty contrast to cheeses and cured meats.
When I’m enjoying sandwiches, I always throw in a pickle for that extra zing. They even make a great side with salads, balancing flavors beautifully.
No matter what I’m serving, these pickles add that little something that takes my meal to the next level.
Give it a try—you won’t be disappointed!
Additional Tips & Notes
To guarantee your homemade dill pickles turn out perfectly, it’s essential to pay attention to a few key details. First, use fresh, crisp cucumbers for the best texture—pick them the same day if possible.
I prefer to slice them into spears or chips, but you can keep them whole if they fit your jars. Don’t skip the garlic or dill; they really enhance the flavor.
Also, remember to sterilize your jars and lids to prevent spoilage. Ultimately, patience is key; let your pickles sit for at least six weeks for the flavors to develop fully.
Happy pickling!