Why You’ll Love This Homemade Manicotti Recipe
When it comes to comfort food, homemade manicotti stands out for its delicious layers of flavor and texture.
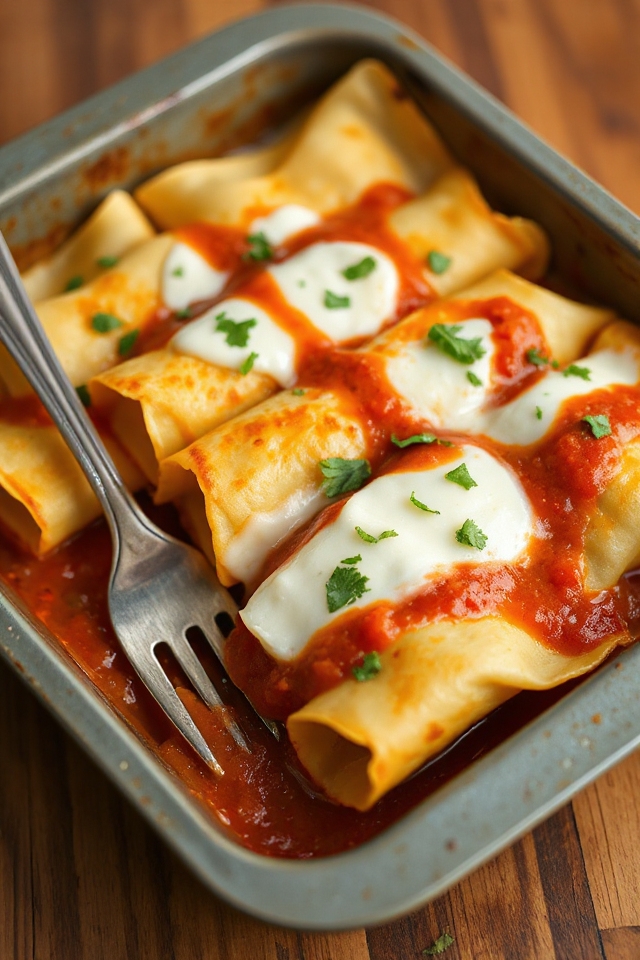
I love how each bite combines the creamy ricotta filling with the gooey mozzarella, all wrapped in delicate crepes. It’s a dish that warms the heart and satisfies the soul, making it perfect for family gatherings or cozy nights in.
Plus, the aroma that fills my kitchen while it bakes is simply irresistible. I can’t help but feel excited when I pull it out of the oven, ready to share this delightful meal with loved ones.
Trust me, you’ll adore it too!
Ingredients of Homemade Manicotti
When it comes to whipping up a delicious homemade manicotti, the ingredients you choose can really make or break the dish. Trust me, you don’t want to skimp on quality when it comes to cheese, and the crepes? Oh, they need to be just right—thin, but sturdy enough to hold all that cheesy goodness.
So, let’s gather what you’ll need to create this comforting masterpiece.
Here’s a handy list of ingredients for your homemade manicotti:
- 6 large eggs
- 3 cups cold water
- 3 tablespoons corn oil
- 1/4 teaspoon kosher salt
- 3 cups all-purpose flour
- 3 lbs ricotta cheese
- 2 lbs shredded low-moisture mozzarella cheese
- 1/2 cup grated cheese (you can use either Romano or Parmesan)
- 1/8 cup chopped fresh parsley
- 6 cups of your favorite tomato sauce
Now, let’s talk about these ingredients for a moment. The ricotta is the star of the filling, so don’t settle for that supermarket brand that tastes like cardboard. Go for the good stuff—creamy and fresh.
And mozzarella? Well, low-moisture is key to keeping your manicotti from turning into a soupy mess. As for the tomato sauce, you can use store-bought or homemade, but I always find that a rich, flavorful sauce elevates the whole dish.
And if you happen to have fresh parsley on hand, it adds a lovely touch of color and flavor, making you feel a little gourmet, even if your kitchen looks like a cheese explosion.
Just remember, cooking is all about having fun and enjoying the process, so don’t stress too much. You’ve got this!
How to Make Homemade Manicotti
So, you’re ready to plunge into making your homemade manicotti? Great choice! Let’s get started with those crepes, the delicate pouches that are going to cradle all that cheesy goodness.
First up, grab your mixing bowl and whisk together 6 large eggs, 3 cups of cold water, 3 tablespoons of corn oil, 1/4 teaspoon of kosher salt, and 3 cups of all-purpose flour. You want this batter to be smooth and runny, kind of like a creamy soup—if you’ve ever accidentally turned pancake batter into a science experiment, you know what I mean.
Now, heat an 8-inch non-stick skillet over medium-high heat. Once it’s hot, pour 1/4 cup of that delightful batter into the skillet, tilting it gently to spread the batter evenly. You’re aiming for a thin layer, but not so thin that it disappears!
Cook it until the crepe starts to look dry and the edges begin to pull away—about a minute. Flip it with a spatula (don’t worry, it’s not as scary as it sounds) and cook the other side for about 20 seconds. Once done, remove it from the skillet and stack those bad boys like pancakes.
Repeat this until you’ve turned all your batter into crepes. You might find yourself channeling your inner chef, or maybe just hoping you don’t set off the smoke alarm.
Next, let’s tackle the filling. In a large mixing bowl, combine 3 pounds of ricotta cheese, 1/2 cup of grated Romano or Parmesan cheese, 1/8 cup of chopped fresh parsley, and half of your 2 pounds of shredded low-moisture mozzarella.
Mix it until everything is well combined. Now, take those crepes and fill each one with about 3 tablespoons of the cheesy filling right in the center. Fold the sides over the filling so they overlap slightly, like a cozy cheese burrito.
Place them seam side down in a large baking dish, snug against one another. Once that’s done, pour about 1/4 cup of your favorite tomato sauce over each manicotti and sprinkle the rest of the mozzarella on top.
All that’s left is to bake them uncovered at 400 degrees for about 20 minutes, or until the cheese is all melty and bubbly. Serve them warm and, if you’re feeling generous, top with extra grated cheese.
You might want to keep a fork handy because these are going to disappear fast. Enjoy!
Homemade Manicotti Substitutions & Variations
After mastering the art of making crepes and filling them with that delicious cheesy mixture, you might be curious about how to customize your homemade manicotti.
You can swap ricotta with cottage cheese for a lighter option or mix in some spinach or sautéed mushrooms for added flavor. For a twist, try using different cheeses like goat cheese or feta.
If you’re looking for a gluten-free version, substitute the all-purpose flour with a gluten-free blend. You could even experiment with sauces, using pesto or alfredo instead of traditional tomato sauce.
The possibilities are endless, so have fun with it!
What to Serve with Homemade Manicotti
What can elevate a delicious serving of homemade manicotti to a truly memorable meal? I love pairing it with a fresh, crisp salad—something like a simple arugula salad with a lemon vinaigrette. The acidity balances the richness of the cheese beautifully.
Garlic bread is another favorite; it’s perfect for scooping up any leftover sauce. If I’m feeling extra indulgent, I might serve a side of sautéed vegetables, like zucchini and bell peppers, tossed in olive oil and garlic.
Finally, a light red wine, like Chianti, complements the flavors wonderfully and makes the meal feel even more special.
Additional Tips & Notes
While making homemade manicotti can be a delightful experience, a few additional tips can enhance your results.
First, don’t rush the crepe-making process; a well-cooked crepe is key to preventing tears. If you have leftover filling, try using it in other dishes or even as a base for a delicious dip.
For added flavor, consider mixing in some sautéed spinach or mushrooms into the ricotta filling.
Finally, let your manicotti rest for a few minutes after baking; this helps the flavors meld together beautifully.
Trust me, these little tweaks can elevate your dish to a whole new level!