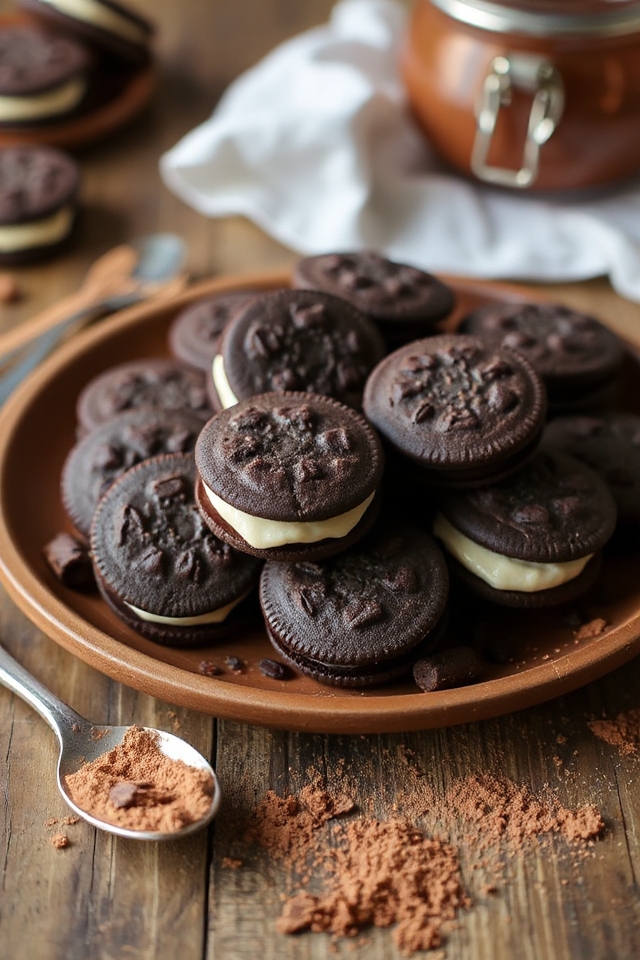
Why You’ll Love This Homemade Oreos Recipe
If you’ve ever craved the classic flavor of Oreos but wanted something fresher, you’re going to love this homemade version.
There’s something special about creating your own treats; the aroma of freshly baked cookies fills the kitchen, instantly elevating your mood.
Plus, you control the ingredients, ensuring they’re as wholesome as you want.
I enjoy the rich chocolate flavor and creamy filling that perfectly balances sweetness and texture.
Every bite reminds me of childhood, yet it feels like a gourmet experience.
Trust me, once you try these, store-bought Oreos won’t stand a chance against your homemade delights!
Ingredients of Homemade Oreos
When it comes to baking, having the right ingredients is essential, especially for something as delightful as homemade Oreos. These cookies aren’t just your ordinary treats; they’re a mini adventure in your kitchen. Just think about the joy of mixing, rolling, and baking, all while the aroma fills your home.
Plus, you get to enjoy the satisfaction of making something delicious from scratch. So, let’s gather what you need to whip up these sweet delights.
Here’s a list of the ingredients you’ll need for your homemade Oreos:
- 1 package devil’s food cake mix
- 2 eggs
- 2 tablespoons water
- 2 tablespoons cooking oil
- 1/2 cup cocoa powder
- 1 package Knox unflavored gelatin
- 1/4 cup cold water
- 1 cup Crisco (yes, the classic shortening)
- 1 lb confectioners’ sugar (and a little extra)
- 1 teaspoon vanilla extract
- Chocolate-flavor Nestle Nesquik powder (for that extra chocolatey goodness)
Now, before you plunge into baking, let’s chat about the ingredients. You may notice the use of Crisco in the filling instead of butter, which might seem a bit old-school, but it actually creates a wonderfully creamy texture that holds up well in the sandwiching process.
The gelatin is a bit of a secret weapon here, giving that filling a nice structure without being too runny. And don’t skimp on the cocoa powder; it’s what gives those cookies their rich chocolatey flavor.
As for the Nesquik powder, it adds a delightful touch to your cookies when you flatten them, making them look as good as they taste. Remember, quality ingredients can make all the difference, so try to go for the best you can find!
Now, let’s get ready to make some homemade magic.
How to Make Homemade Oreos
Alright, let’s plunge into the delightful process of making your very own homemade Oreos! First things first, grab that 1 package of devil’s food cake mix and toss it into a big mixing bowl. Next, add in 2 eggs, 2 tablespoons of water, and 2 tablespoons of cooking oil. Don’t worry about making a mess—baking is all about having fun, right?
Now, here comes the slightly messy part: add in 1/2 cup of cocoa powder. Mix everything together until you can shape the dough into a ball. Once you’ve got that dough ball, let it sit for about 20 minutes. This little rest is essential; it helps the dough firm up so you can roll it into those iconic cookie shapes.
After your dough has rested, it’s time to roll it into balls. Grab a small portion of dough and roll it into a 1/2 inch ball—think little chocolatey bombs of joy. Place these on a greased cookie sheet, leaving enough space between them because they’ll spread out during baking.
Now, for the fun part: take the smooth side of a drinking glass, grease it up, and dip it into that chocolate-flavor Nestle Nesquik powder. Press down gently on each ball to flatten it out, and then pop them in a preheated oven at 400 degrees Fahrenheit for about 8 minutes. You might notice they puff up a bit, but don’t worry; they’ll flatten out again once you take them out.
After baking, make sure to flatten them a bit more with the back of a spatula before letting them cool completely. Just a heads up, the smell will be so good that you might be tempted to sneak a bite—resist the urge; the filling is worth the wait.
Speaking of filling, let’s whip that up while your cookies cool. Start by softening 1 package of Knox unflavored gelatin in 1/4 cup of cold water. You’ll see it get all goopy—this is where the magic happens.
Place that gooey gelatin in a heatproof cup and let it dissolve over a pan of hot water. Meanwhile, in a separate bowl, beat 1 cup of Crisco until it’s light and fluffy. This might take a little elbow grease, but it’s so worth it. Gradually add in 1 lb of confectioners’ sugar and 1 teaspoon of vanilla extract, mixing until everything is well combined and fluffy.
Now, the cooled gelatin mixture can join the party—beat it into the filling until everything is smooth and creamy.
Now comes the best part: assembly! Take about 1 tablespoon of that luscious filling and sandwich it between two cooled cookies. You’ll want to press them gently together until the filling oozes out just a bit.
And there you have it—your very own homemade Oreos, ready to enjoy (or share, but let’s be honest, you might want to keep these all to yourself). So, roll up those sleeves, get that apron on, and prepare for some serious cookie magic!
Homemade Oreos Substitutions & Variations
There are several exciting substitutions and variations you can try to customize your homemade Oreos. For a gluten-free option, swap the devil’s food cake mix for a gluten-free blend.
If you’re craving something a bit different, use chocolate cake mix instead. You can also experiment with the filling by adding peppermint extract or almond extract for a unique flavor twist.
Want a creamier filling? Substitute half the Crisco with cream cheese. For a colorful touch, add food coloring to the filling.
Don’t hesitate to get creative; these tweaks can make your homemade Oreos even more delightful and personalized!
What to Serve with Homemade Oreos
If you’re looking to elevate your homemade Oreos experience, consider pairing them with a variety of delightful accompaniments. A tall glass of cold milk is a classic choice, perfect for dipping.
You might also enjoy serving them with a scoop of vanilla ice cream, creating a delicious sandwich treat. For a fun twist, try adding fresh fruit like strawberries or raspberries on the side; their tartness complements the sweetness beautifully.
If you’re feeling adventurous, a rich chocolate sauce can make for an indulgent dipping option. Trust me, these combinations will take your homemade Oreos to the next level!
Additional Tips & Notes
Pairing your homemade Oreos with delightful accompaniments is just the beginning of the fun.
To guarantee your cookies turn out perfectly, I recommend chilling the dough for about 30 minutes before baking. This helps maintain their shape.
If you prefer a different flavor, try adding a splash of peppermint extract to the filling for a revitalizing twist.
Keep an eye on them while baking; every oven is different.
Finally, store your Oreos in an airtight container to maintain their freshness. They’ll last up to a week, but trust me, they probably won’t last that long!
Enjoy your baking adventure!