Why You’ll Love This Homemade Strawberry Shortcake Recipe
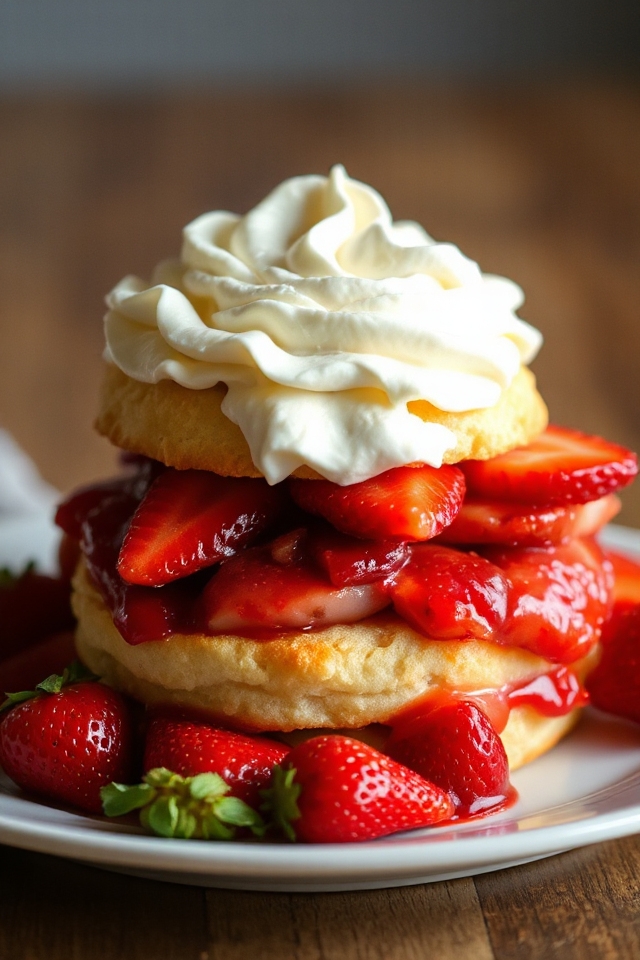
When you take a bite of this homemade strawberry shortcake, you’ll understand why it’s a beloved dessert. The moment the sweet strawberries mingle with the fluffy, buttery biscuits, you’ll be hooked.
Each layer delivers a burst of flavor, from the juicy strawberries to the creamy whipped topping. It’s simple yet elegant, making it perfect for any occasion.
I love how it brings friends and family together, creating lasting memories. Plus, it’s easy to whip up, so you won’t be stuck in the kitchen for hours.
Trust me, once you try it, you’ll want to make it again and again!
Ingredients of Homemade Strawberry Shortcake
When it comes to making a delicious homemade strawberry shortcake, the right ingredients are key. You want to verify that your cake is fluffy, your strawberries are sweet, and that everything comes together harmoniously. It’s a simple recipe, but each ingredient plays an essential role in creating that perfect summer dessert.
So, let’s gather what you need before we jump into the fun part—making it!
Here’s what you’ll need for your homemade strawberry shortcake:
- 4 cups strawberries
- 2 cups flour
- 1/4 cup shortening
- 3 teaspoons baking powder
- 3/4 cup milk
- 1 teaspoon salt
- 1/4 cup sugar (for the strawberries)
Now, let’s talk about those ingredients a bit more. Fresh, ripe strawberries are crucial here. You want them to be as sweet and juicy as possible because they’re the star of the show.
If your strawberries are a little on the tart side, don’t worry too much; the sugar will help bring out their natural sweetness. About the shortening, some folks swear by butter for a richer flavor, but shortening gives that light, fluffy texture that’s hard to beat in a biscuit.
And speaking of biscuits, don’t stress too much about measuring everything perfectly. Cooking is all about having fun, so if you find yourself using a bit more or less, just roll with it.
After all, it’s the love you put into it that really counts, right?
How to Make Homemade Strawberry Shortcake
Alright, let’s plunge into the delightful world of homemade strawberry shortcake. First things first, you’ll want to preheat your oven to a toasty 450°F. Trust me, your future self will thank you for that warm, golden-brown goodness.
While your oven is warming up, grab those 4 cups of fresh strawberries. Give them a good wash, trim the tops, and slice them up. Then, toss them in a medium-sized bowl with 1/4 cup of sugar. Mix those juicy beauties gently, and let them chill in the refrigerator while you work on the biscuit part. This is one of those moments where you can feel like a fancy chef, right? Letting the sugar work its magic on the strawberries—so sweet, so summery.
Now, let’s shift gears to the biscuit base. In a large mixing bowl, measure out 2 cups of flour, 3 teaspoons of baking powder, and 1 teaspoon of salt. You know the drill—mix it all together, but here’s where it gets fun: cut in 1/4 cup of shortening until it looks like cornmeal. I won’t lie, this part can get a bit messy, but who doesn’t love a little flour on their face?
Once that’s done, it’s time to stir in almost all of the 3/4 cup of milk. If it feels a little too dry, add just enough milk to make the dough soft and puffy. When your dough is looking good, round it up and place it on a lightly floured surface. Knead it gently for about 20-25 seconds—don’t go overboard. We want biscuits, not a workout.
Now comes the fun part: forming the biscuits. I like to use a cookie scoop for this—it’s much less messy than rolling everything out. Just scoop out the dough and place those little mounds onto an ungreased baking sheet. Slide them into the oven for about 10 to 12 minutes or until they turn that lovely shade of golden brown. The aroma wafting through your kitchen? Pure bliss.
Once they’re done, let them cool a bit, but don’t let them go cold. Serve warm or cold, topped with those sweet, sugary strawberries, a drizzle of milk or ice cream, and a generous dollop of whipped cream. Just thinking about it makes me want to whip up a batch right now. Enjoy every bite—this is summer in dessert form.
Homemade Strawberry Shortcake Substitutions & Variations
While I love the classic homemade strawberry shortcake, there are plenty of substitutions and variations to make it your own.
For a gluten-free option, I often use almond flour or a gluten-free blend instead of regular flour. You can swap shortening for butter for a richer flavor. If strawberries aren’t in season, try using blueberries or peaches.
For a twist, I’ve added a splash of vanilla extract or a hint of lemon zest to the dough. You can also experiment with whipped cream by folding in mascarpone cheese or flavored extracts.
The possibilities are endless, so get creative!
What to Serve with Homemade Strawberry Shortcake
After experimenting with different variations of homemade strawberry shortcake, I’ve found that pairing it with the right accompaniments can elevate the dessert even further.
I love serving it with a scoop of vanilla ice cream or a dollop of freshly whipped cream to add a creamy texture. A drizzle of chocolate sauce or a sprinkle of crushed nuts can also provide a delightful contrast.
For an extra touch, I sometimes offer a side of mint leaves to enhance the flavors.
Don’t forget a cup of coffee or tea, which perfectly complements the sweetness of the shortcake and rounds out your dessert experience!
Additional Tips & Notes
To guarantee your homemade strawberry shortcake turns out perfectly every time, I’ve picked up a few helpful tips along the way.
First, make sure your strawberries are ripe and sweet; they’re the star of the dish! I also recommend chilling the strawberries with sugar for at least an hour to enhance their flavor.
When mixing the dough, don’t over-knead; a light touch keeps it fluffy. If you’re short on time, you can use store-bought biscuits.
Finally, serve it with freshly whipped cream or vanilla ice cream for extra indulgence. Enjoy your baking adventure; it’s worth it!