Why You’ll Love This Homemade Pita Bread Recipe
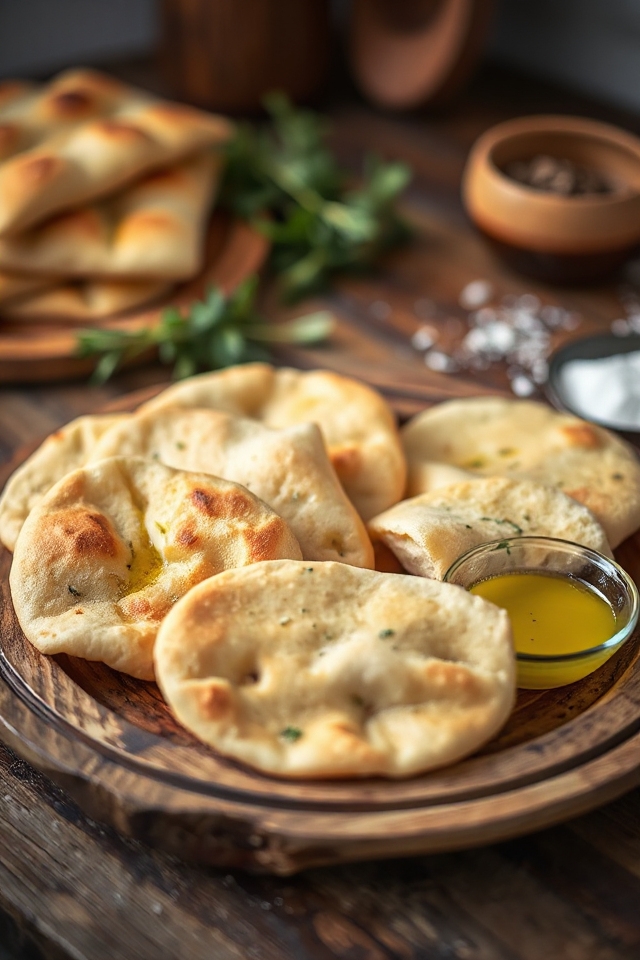
There’s something magical about homemade pita bread that transforms any meal into a special occasion. When I pull those warm, puffy pockets from the oven, I can’t help but smile. The aroma fills my kitchen, inviting everyone to gather around.
It’s not just the taste—though it’s delicious—but the experience of making it from scratch that I cherish. Each bite brings a sense of comfort and nostalgia, reminding me of family gatherings.
Plus, you can customize it however you want! Whether it’s for dipping, stuffing, or just enjoying fresh, homemade pita bread always elevates the moment. You’ll absolutely love it!
Ingredients of Homemade Pita Bread
When you’re ready to explore the world of homemade pita bread, gathering your ingredients is the first step. You want to make sure you have everything on hand before you start mixing and kneading. Trust me, nothing feels worse than realizing you’re out of yeast halfway through the process.
So, let’s get everything together and set the stage for some delicious baking.
Here’s what you’ll need:
- 3/4 cup warm water (not too hot, or you’ll end up with a sad, dead yeast)
- 1.5 envelopes (which is about 3 3/8 teaspoons) of active dry yeast
- 6 cups of bread flour (this gives the pitas their chewy texture—so important!)
- 1 1/2 teaspoons of salt (for flavor, of course)
- 1 1/2 cups of warm milk (this adds richness to the dough)
- Extra virgin olive oil (just a little for greasing the bowl)
Now, let’s chat about those ingredients for a moment. The quality of the flour can make a big difference in your pita game. If you can, go for higher protein bread flour; it helps create that lovely structure we all adore.
And don’t skimp on the yeast—using fresh active dry yeast is essential for those magical puffs we want to see in the oven. Oh, and while you’re at it, make sure your water and milk are warm but not scalding; you want to gently wake up that yeast, not send it to an early retirement.
Trust me, you’ll want to avoid that disaster. So gather these ingredients, and let’s get ready to make some magic in the kitchen!
How to Make Homemade Pita Bread
Alright, let’s plunge into the delightful world of making homemade pita bread. First things first, you’ll want to set the stage in your kitchen. Preheat your oven to a sizzling 500°F (that’s hot, folks), and place a pizza stone on the bottom rack. This little piece of magic is going to help those pitas puff up beautifully.
Now, while the oven is heating, grab your mixing bowl and combine 3/4 cup of warm water with 1.5 envelopes (that’s about 3 3/8 teaspoons) of active dry yeast. Give it about 10 minutes to work its foamy magic. You want to see bubbles forming—that’s the yeast waking up and getting excited about the party you’re throwing.
Now that your yeast is all bubbly and happy, it’s time to bring in the heavy hitters. In a food processor, add 6 cups of bread flour and 1 1/2 teaspoons of salt. Give it a quick pulse to combine.
With the processor running, pour in that glorious yeast mixture and 1 1/2 cups of warm milk. Let it all whirl until it forms a cohesive ball of dough. Once it does, turn it out onto a lightly floured surface and knead it a few times—just enough to get it feeling smooth and elastic.
Form it into a ball and place it in a bowl that you’ve lightly greased with extra virgin olive oil. Cover it with plastic wrap and let it rise in a warm spot for about an hour, or until it doubles in size.
After that satisfying hour of waiting, it’s time for the fun part. Punch down the dough (yes, really, let out all that pent-up energy) and divide it in half. Cut each half into 8 pieces, rolling them into little balls, then flattening them into 6-inch rounds. You should have a lovely formation of pita rounds now.
Arrange them on a floured surface or baking sheets, cover them with plastic wrap again, and let them rise for another 25 minutes. Once they’re puffy and ready, slide them onto that hot pizza stone using a floured pizza peel.
Bake for about 5 minutes until they puff up like little clouds of joy. Serve them hot or wrap them in foil to keep warm. There you have it—your homemade pita bread, ready to be devoured. How’s that for a culinary adventure?
Homemade Pita Bread Substitutions & Variations
After mastering the art of making homemade pita bread, you might find yourself wanting to mix things up a bit.
I love experimenting with different flours; whole wheat adds a nutty flavor, while spelt lends a slightly sweet taste. You can even try incorporating herbs like rosemary or thyme into the dough for an aromatic twist.
If you’re looking for a gluten-free option, almond flour or chickpea flour work well, though you may need to adjust the liquid.
Finally, consider adding spices like cumin or paprika for a unique flavor profile that’ll elevate your pita experience!
What to Serve with Homemade Pita Bread
While homemade pita bread is delicious on its own, it truly shines when paired with a variety of dips and spreads.
I love serving it with creamy hummus, which adds a rich flavor that complements the soft bread. Tzatziki, with its invigorating yogurt and cucumber, is another favorite of mine.
If I’m in the mood for something spicy, I go for baba ghanoush, which brings a smoky taste to the table. For a heartier option, I often pair pita with a warm spinach and feta dip.
Trust me, these combinations elevate your homemade pita experience to another level!
Additional Tips & Notes
To guarantee your homemade pita bread turns out perfectly every time, I recommend paying close attention to the rising times and the temperature of your ingredients.
Make sure your water and milk are warm, but not hot, as this can kill the yeast. If your dough isn’t rising well, try placing it in a warmer spot.
For extra flavor, consider adding herbs or spices to the dough. Remember, the key to a good pita is a hot oven; don’t skip preheating your pizza stone.
Finally, if you have leftovers, freeze them for a quick treat later! Enjoy your pita-making journey!