Why You’ll Love This Homemade Ricotta Recipe
When you try this homemade ricotta recipe, you’ll instantly appreciate the freshness and creaminess that store-bought options just can’t match.
The moment you taste it, you’ll realize how simple and rewarding it’s to make your own cheese. I love knowing exactly what goes into it, and the satisfaction of crafting something delicious in my own kitchen.
Plus, it’s incredibly versatile! You can spread it on toast, dollop it onto pasta, or mix it into desserts. Each bite bursts with flavor, and I guarantee you’ll never look at ricotta the same way again.
It’s a game changer!
Ingredients of Homemade Ricotta
When it comes to whipping up your own homemade ricotta, the ingredients are as simple as they’re essential. You don’t need a lot, but what you do need packs a punch of flavor and freshness. Imagine the richness of cream mingling with the lightness of low-fat milk—it’s a match made in cheese heaven.
As you gather your ingredients, you’ll feel like a mini cheesemaker ready to create something truly special. So, let’s take a look at what you’ll need for this delightful culinary adventure.
Here’s what you’ll need for your homemade ricotta:
- 2 pints of 1% low-fat milk
- 1 cup of cream
- 1/2 teaspoon of salt
- 3 tablespoons of fresh lemon juice or vinegar
- Cheesecloth (to line the sieve)
Now, a quick note about the ingredients: While the recipe calls for low-fat milk, don’t feel like you’re stuck in a low-fat lane. If you’re feeling indulgent, go ahead and use whole milk for a richer texture.
The cream, though, is non-negotiable if you want that lovely creaminess—think of it as the secret weapon in your ricotta arsenal. And whether you choose lemon juice or vinegar, each option brings its own unique twist to the flavor.
How to Make Homemade Ricotta
Making homemade ricotta is easier than you might think, and honestly, it’s an experience that will make you feel like an absolute culinary rockstar. So, let’s roll up our sleeves and get down to business.
First, grab your 2 pints of 1% low-fat milk and 1 cup of cream. Pour them into a large pot and sprinkle in 1/2 teaspoon of salt. Now, turn the heat to medium and bring this creamy concoction to a boil. But don’t just stand there—give it a good stir. You want to avoid that oh-so-embarrassing scorching situation. Trust me, burnt milk isn’t the flavor we’re aiming for here.
Once your mixture reaches that glorious boil, it’s time for the magic touch. Add in 3 tablespoons of fresh lemon juice or vinegar—whichever one you have on hand or prefer. You might notice a bit of a transformation happening right before your eyes. That’s the curdling!
Just reduce the heat to low and stir gently for about 2 minutes. This is the part where you might want to take a moment to appreciate the science happening in your kitchen. When it looks all curdled and curious, remove it from the heat and pour the mixture into the prepared sieve lined with cheesecloth.
Let it drain for 45 to 60 minutes, depending on how creamy you want your ricotta. If you’re feeling adventurous, you can always add back some of that drained liquid for a texture that’s just right for you.
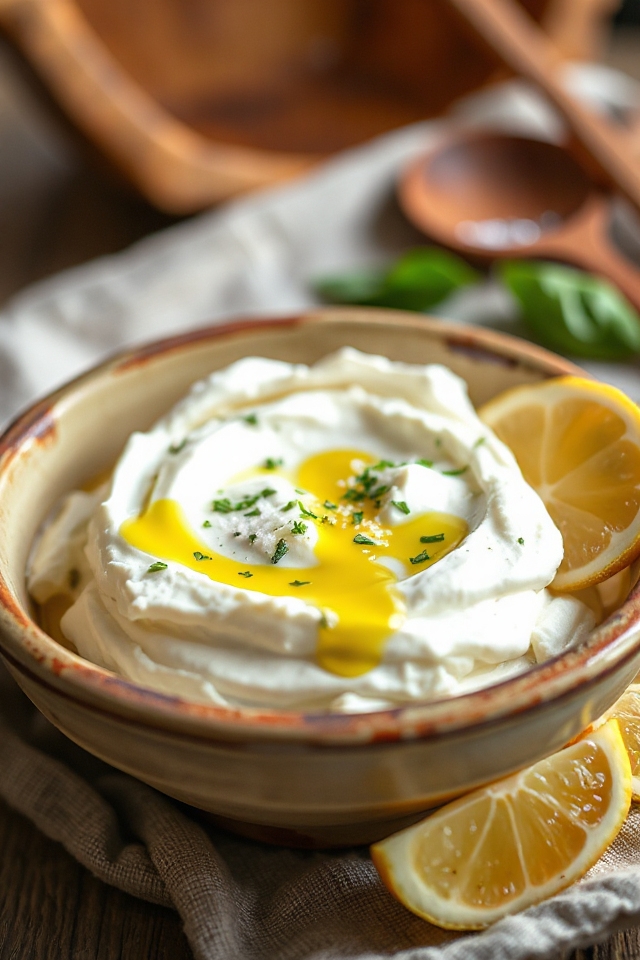
And voila! After all that waiting—which let’s be honest, is the hardest part—you’re left with about 2 cups of fresh, creamy ricotta. It will keep in your fridge for a couple of days, but good luck not devouring it all in one sitting.
Whether you slather it on toast, mix it into pasta, or just eat it straight from the bowl (totally not judging), this homemade ricotta will bring a little bit of magic to your meals. So, go ahead and enjoy your cheesemaking adventure, and remember, perfection is overrated—just have fun with it.
Homemade Ricotta Substitutions & Variations
Although I love the classic homemade ricotta recipe, there are plenty of substitutions and variations that can elevate your cheese-making game.
For a richer flavor, try using whole milk instead of low-fat, or even a mix of goat and cow’s milk for a tangy twist.
If you’re feeling adventurous, add herbs like basil or thyme to the milk before boiling for a savory touch.
For a sweeter version, mix in a bit of honey or vanilla extract after draining.
Don’t hesitate to play around with different acids like lime juice or apple cider vinegar for unique flavor profiles.
Enjoy experimenting!
What to Serve with Homemade Ricotta
After exploring the exciting ways to customize homemade ricotta, it’s time to think about how to enjoy this delicious cheese.
I love spreading it on crusty bread, topped with a drizzle of honey and fresh herbs for a delightful appetizer. Pairing it with seasonal fruits like figs or peaches creates a revitalizing dessert.
For a savory twist, I often toss it into pasta dishes or layer it in lasagna. A dollop on a warm vegetable salad adds creaminess and flavor.
Honestly, the possibilities are endless, so feel free to experiment and find your favorite combinations!
Additional Tips & Notes
When you’re making homemade ricotta, keep a few tips in mind to guarantee success.
First, use fresh milk and cream for the best flavor and texture. If you want a richer ricotta, try using half-and-half instead of low-fat milk.
Don’t rush the curdling process; let the mixture sit undisturbed for those two minutes. Remember, the longer you drain, the firmer your ricotta will be, so adjust according to your preference.
Finally, feel free to experiment with flavors by adding herbs or spices during the mixing stage. Enjoy your fresh ricotta within two days for peak taste!