Why You’ll Love This Homemade Greek Yogurt Recipe
If you’ve ever tried store-bought Greek yogurt, you know how creamy and delicious it can be, but making it at home takes that experience to a whole new level.
You get to control the ingredients, ensuring everything’s fresh and nutritious. Plus, the satisfaction of crafting something so delightful yourself is unbeatable.
The texture is thick and velvety, and the flavor is simply unmatched. I love personalizing it with my favorite fruits and honey.
It’s versatile, too—perfect for breakfast, snacks, or even savory dishes.
Trust me, once you try homemade Greek yogurt, you won’t want to go back to store-bought!
Ingredients of Homemade Greek Yogurt
Making homemade Greek yogurt is such a rewarding experience, and trust me, it’s not as complicated as it sounds. The best part? You probably already have most of the ingredients in your kitchen.
With a little patience and a few simple steps, you can whip up a batch of creamy, dreamy yogurt that will make your taste buds dance. Plus, there’s something special about knowing exactly what’s going into your food. So, let’s gather our ingredients and get to work.
Here’s what you’ll need to make this delicious homemade Greek yogurt:
- 8 cups of 1% low-fat milk
- 2 teaspoons of plain fat-free yogurt (make sure it has live cultures)
- 1/4 cup of non-fat powdered milk
Now, let’s talk about these ingredients a bit. First, the milk is the star of the show here; it’s what gives our yogurt that lovely creamy texture. You can use different types of milk, but I find that 1% strikes a nice balance between richness and healthiness.
As for the plain yogurt, that’s your starter culture, so pick one that you really enjoy, because its flavor will influence your final product. And the powdered milk? It’s like a secret weapon—boosting the thickness of your yogurt without adding any extra calories.
If you want to get adventurous, you can even try different milk types or yogurt starters. Just remember, the quality of your ingredients really shines through in the end result. Happy yogurt-making!
How to Make Homemade Greek Yogurt
Making homemade Greek yogurt is one of those kitchen adventures that feels a bit like magic—turning humble ingredients into something creamy and delightful. So, let’s roll up our sleeves and get started.
First up, grab 8 cups of 1% low-fat milk and pour it into a large saucepan. Now, we’re going to heat this up over medium-high heat. It’s important to stir occasionally because nobody likes a scorched bottom; trust me, I’ve learned that the hard way. You want to get the milk to a nice, steamy 180 degrees.
Once you hit that magical number, take the pot off the heat and let it cool. Here’s a little tip: keep an eye on the temperature as you wait for it to drop to between 110 and 120 degrees. Stirring occasionally helps with this too—it’s all about keeping that milk smooth and friendly.
Now, it’s time to add some personality to our yogurt. Once the milk has cooled, grab those 2 teaspoons of plain fat-free yogurt and the 1/4 cup of non-fat powdered milk. Whisk them into the warm milk until everything is blended together nicely. This is where the yogurt magic starts to happen.
Pour your mixture into a bowl with a lid, and here’s where the fun begins: wrap that bowl in thick kitchen towels and place it in a preheated oven. You don’t need to set the oven to a specific temperature, just warm enough to keep things cozy. I usually let my yogurt sit undisturbed for about 8 to 12 hours, and sometimes I get a little impatient and leave it for 13. Who knew yogurt could be such a test of patience?
After your yogurt has had its beauty sleep, it’s time to strain it. Grab a mesh strainer or colander lined with a coffee filter or paper towels—cheese cloth works too if you’re feeling fancy. Pour the yogurt into this setup and let it drain for about an hour or two, depending on how thick you like your Greek yogurt.
While it’s draining, I often find myself daydreaming about all the ways I can use this creamy goodness—smoothies, parfaits, or just a simple dollop on my breakfast bowl. Once it reaches your desired thickness, transfer it to a lidded storage container and pop it in the fridge.
There you have it, homemade Greek yogurt ready to enjoy for up to a week. Who knew being a yogurt maker could feel so rewarding? Enjoy your creation!
Homemade Greek Yogurt Substitutions & Variations
After enjoying the satisfaction of creating your own homemade Greek yogurt, you might wonder how to mix things up or tailor it to your taste.
You can swap out the 1% low-fat milk for whole milk or even almond milk for a dairy-free version. For added creaminess, try incorporating heavy cream.
If you want a sweeter yogurt, mix in honey or maple syrup before straining. Feeling adventurous? Add vanilla extract or fresh herbs for unique flavors.
You can also experiment with different straining times to achieve your preferred thickness. Customizing your yogurt is fun, so don’t hesitate to get creative!
What to Serve with Homemade Greek Yogurt
While enjoying your homemade Greek yogurt, you might wonder what delicious pairings will elevate your experience.
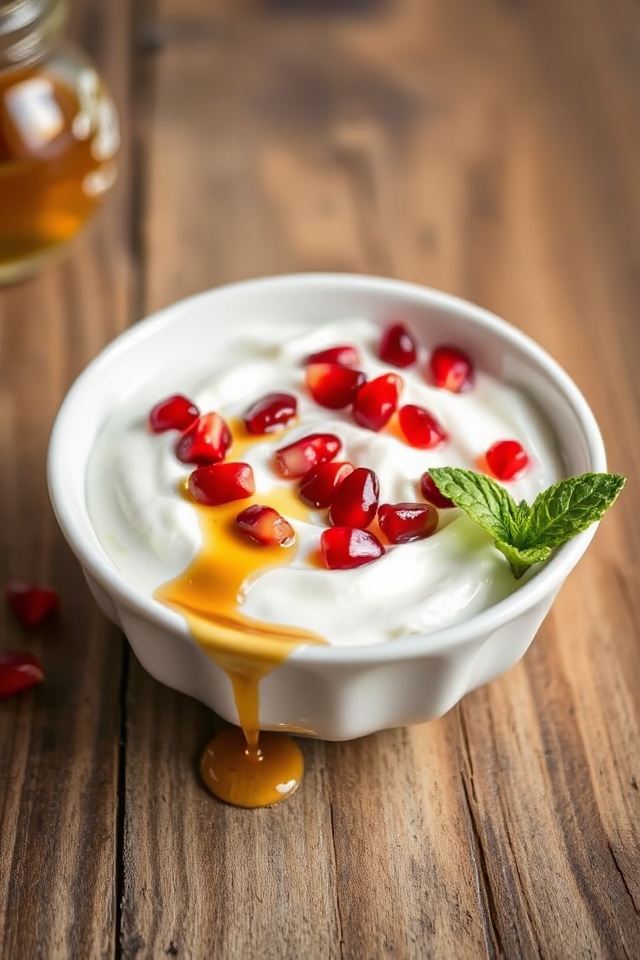
I love topping mine with fresh fruits like berries or sliced peaches for a burst of flavor. A drizzle of honey or maple syrup adds just the right sweetness.
For a savory twist, I often mix in some chopped cucumber and garlic to create a revitalizing tzatziki.
If I’m in the mood for a snack, I’ll sprinkle granola on top for crunch. You can also serve it with nuts or seeds for added texture.
The options are endless, and each one is delightful!
Additional Tips & Notes
To guarantee your homemade Greek yogurt turns out perfectly, I recommend paying close attention to the milk’s temperature.
Use a reliable thermometer; it makes a difference. Don’t rush the cooling process either – letting it settle between 110-120 degrees is essential for the culture to thrive.
If you prefer thicker yogurt, consider straining it longer. I often leave mine for two hours.
Also, remember to reserve a bit of yogurt as a starter for your next batch.
Finally, if you like flavored yogurt, add fruits or honey after straining for a delicious twist. Enjoy your creamy creation!