Why You’ll Love This Homemade Blackberry Jam Recipe
When you try this homemade blackberry jam recipe, you’ll quickly discover how easy it’s to create a burst of summer flavors in a jar.
I love how vibrant and sweet the blackberries become, transforming into a luscious spread that brightens my breakfast. It’s satisfying to know exactly what’s in my jam, without any preservatives or artificial flavors.
Plus, it fills my kitchen with an irresistible aroma while cooking! I find the process relaxing, and the joy of sharing jars with friends and family makes it even better.
Trust me, once you try it, you’ll be hooked on this delightful treat!
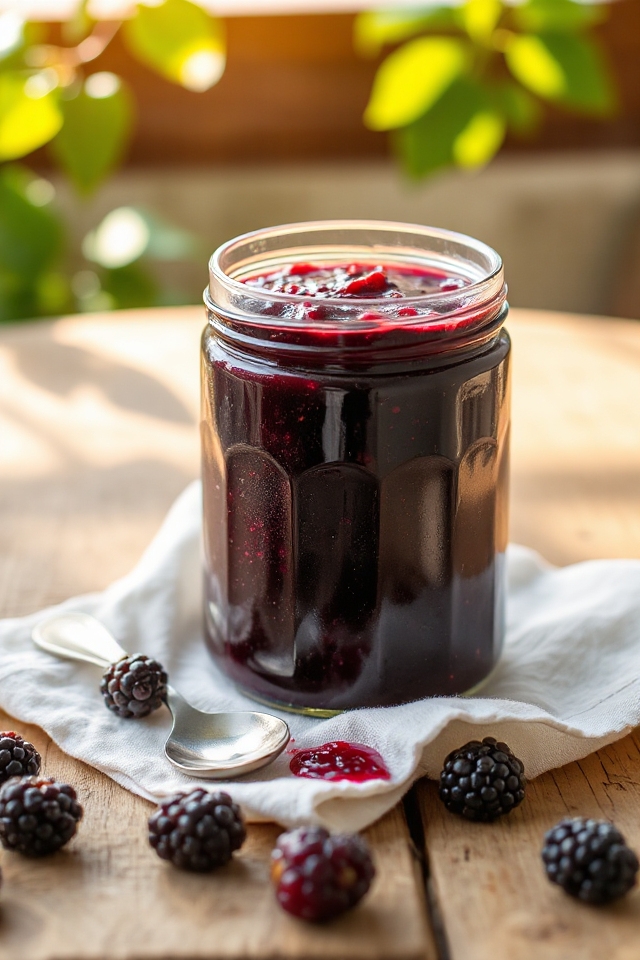
Ingredients of Homemade Blackberry Jam
Making your own homemade blackberry jam isn’t just about the end product; it’s about the whole experience—the delightful aroma of berries simmering on the stove, the anticipation of slathering that sweet goodness on toast, and the joy of sharing with friends and family.
Plus, you get to control exactly what goes into your jam, which is a big win, right? So, let’s explore what you’ll need to whip up this delicious jam.
Ingredients for Homemade Blackberry Jam:
- 5 cups crushed blackberries (remember, don’t puree them—just crush with a potato masher)
- 7 cups sugar (yes, it sounds like a lot, but this is jam, after all)
- 1 package (1 3/4 ounces) dry pectin (Ball or Sure Jell work just fine)
Now, when it comes to the ingredients, there are a few things to keep in mind.
First off, ripe blackberries are vital for that rich flavor and color. When you’re at the store or picking them yourself, look for plump, dark berries. They should be sweet and fragrant, not mushy or dried out.
And about that sugar—some folks might cringe at the amount, but sugar is essential for both flavor and preservation.
If you’re feeling adventurous, you could experiment with reducing the sugar a bit or even adding a splash of lemon juice for some zing, but just know that this might change the texture and sweetness of your jam.
How to Make Homemade Blackberry Jam
Alright, let’s explore the delightful process of making your very own homemade blackberry jam. Trust me, there’s nothing quite like the satisfaction of spreading something you’ve created yourself on your morning toast.
To start, gather your ingredients: you’ll need 5 cups of crushed blackberries, 7 cups of sugar, and a package (that’s 1 3/4 ounces) of dry pectin. Now, a quick note about those blackberries—make sure they’re ripe and juicy, because that’s where all the flavor magic happens.
First things first, grab a very large pot—an 8-quart one is perfect—and carefully measure out those 5 cups of crushed blackberries. Remember, we’re crushing here, not pureeing; so channel your inner berry-masher with a potato masher.
Once you’ve got those berries in the pot, it’s time to measure out your 7 cups of sugar. Yes, it sounds like a mountain of sugar, but it’s essential for that sweet jammy goodness.
Now, sprinkle in the dry pectin a little at a time while stirring the blackberries constantly. This will help everything blend together nicely.
Now, let’s heat things up. Turn the stove to high and keep stirring until your mixture comes to a full boil. You’ll know it’s ready when it’s bubbling away like it’s having a party.
Once you hit that boiling point, add all the sugar at once and give it a good stir. Then, bring it back to a full hard boil while stirring like your life depends on it. You’ll want to keep this going for exactly one minute—no more, no less.
After that, remove your pot from the heat and ladle the jam into clean, hot 8-ounce jars, leaving about 1/4 inch of space at the top (this is where I always get a bit too excited and end up with jam on my fingers).
Don’t forget to wipe the rims of the jars before adding the canning lids and rings, making sure they’re on fingertip tight.
Now, place them in a canner filled with very hot water, ensuring the water is at least an inch above the jars. Process them in a boiling water bath for 10 minutes, then let them cool upright on a towel for about 12 hours.
And there you have it—your very own homemade blackberry jam, ready to enjoy!
Homemade Blackberry Jam Substitutions & Variations
While I love the classic taste of homemade blackberry jam, there’s always room for creativity in the kitchen.
You can swap in other berries like raspberries or blueberries for a unique twist. If you prefer a lower sugar option, try using honey or maple syrup instead.
Adding a splash of lemon juice can brighten the flavors, while spices like cinnamon or vanilla extract add warmth. For a savory option, mix in a touch of balsamic vinegar or chili flakes.
Experimenting with these substitutions and variations allows me to personalize my jam, making each batch a delightful surprise!
What to Serve with Homemade Blackberry Jam
Whether you’re enjoying a lazy weekend breakfast or hosting a cozy brunch, homemade blackberry jam adds a burst of flavor that pairs beautifully with many dishes.
I love spreading it on warm, buttered toast or fluffy pancakes. It’s also fantastic with creamy goat cheese on crackers for a delightful appetizer.
You can’t go wrong adding it to yogurt or oatmeal for a sweet twist. For a special treat, try it in between layers of sponge cake or on top of vanilla ice cream.
The possibilities are endless, and each bite reminds me of summer’s sweetness!
Additional Tips & Notes
Before you plunge into making your homemade blackberry jam, I recommend gathering all your ingredients and tools first to streamline the process.
Make sure your jars are clean and hot; this helps with sealing. If you prefer a less sweet jam, you can reduce the sugar slightly, but it may alter the texture.
Don’t skip the boiling time; it’s essential for proper preservation. Finally, if you want a more vibrant flavor, consider adding a splash of lemon juice.
Remember to store your jam in a cool, dark place, and enjoy the fruits of your labor all year round!